BRING BACK THE SPARKLE The Secret Household Kitchen Hack That Restores Your Dull Jewelry To Better Than New In Seconds
The frustration of reaching into a jewelry box only to find a favorite silver necklace or a cherished gold-filled bracelet looking dark, dull, and lifeless is a universal experience. Over time, the very items we wear to feel radiant—those pieces of silver, brass, gold, and German silver—become victims of the environment. Oxidation is a relentless process triggered by simple moisture, exposure to the air, and the invisible residue left behind by our daily routines. Every spritz of perfume, every application of luxury lotion, and every cloud of hairspray adds a microscopic layer of grime that eventually steals the metal’s inherent brilliance. Many people look at their tarnished treasures and assume the damage is permanent or that the piece has simply reached the end of its aesthetic life. They believe that restoring that original, high-end luster requires expensive commercial chemicals or a costly trip to a professional jeweler. However, the truth is far more convenient and infinitely more satisfying. You can reclaim the breathtaking shine of your collection using a handful of ingredients already sitting in your kitchen pantry.
Maintaining a stunning jewelry collection does not have to be a chore or a financial burden. The secret to professional-grade results lies in a simple but powerful chemical reaction that feels like a magic trick performed right on your countertop. By utilizing salt, baking soda, liquid dish soap, and common aluminum foil, you can create a high-efficiency cleaning station that does the hard work for you. Unlike abrasive scrubbing, which can leave tiny, microscopic scratches on soft metals and eventually wear down the surface, this method relies on the principles of electrochemistry. It is a gentle, non-toxic approach that lifts the tarnish away without forcing you to choose between cleanliness and the structural integrity of your favorite accessories.
To understand why this method is so effective, one must look at the science behind the shine. When baking soda and salt are dissolved in boiling or very hot water, they create an electrolytic solution. This solution acts as a medium for a process known as ion exchange. When tarnished metal is submerged in this liquid and makes direct physical contact with aluminum foil, the foil acts as a “sacrificial” metal. Because aluminum has a higher affinity for sulfur—the element primarily responsible for that dark tarnish on silver—the chemical reaction causes the sulfur atoms to detach from the jewelry and migrate over to the foil. The dish soap plays a supporting but vital role by breaking through the surface tension of oils and skin residues, allowing the electrolytic solution to reach every crevice and intricate detail of the metal.
The process begins with a few simple preparations. First, find a small heat-resistant bowl—ceramic or glass works best. Take a sheet of standard aluminum foil and line the interior of the bowl completely, ensuring that the shiny side is facing up. The shiny side provides the best surface area for the reaction to take place. While you prepare the bowl, bring a small amount of water to a boil. Once the water is ready, pour it into the foil-lined bowl, filling it deep enough to ensure your jewelry will be completely submerged.
Next, add one tablespoon of salt and one tablespoon of baking soda to the hot water. You will notice an immediate fizzing as the ingredients react with the heat, which is a sign that the cleaning environment is being activated. Stir the mixture gently until the granules are fully dissolved and the water becomes clear. Finally, add two or three drops of a standard grease-cutting dish soap. Stir once more to incorporate the soap, creating a specialized bath that is now ready for your tarnished items.
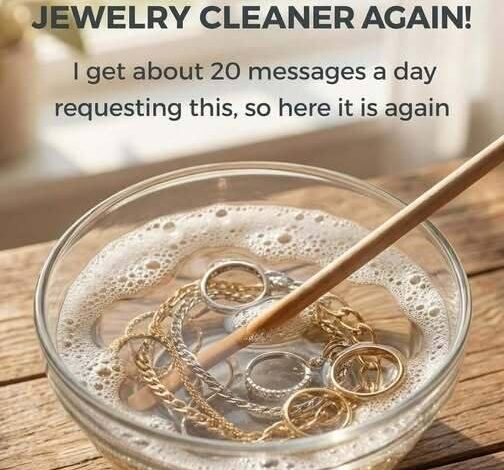
When you are ready to begin the restoration, gently drop your jewelry into the solution. It is absolutely critical that the metal of each piece makes direct contact with the aluminum foil lining the bowl. This contact completes the circuit required for the electrochemical transfer to occur. Almost immediately, you will see the science in action. Tiny bubbles will begin to dance around the surface of the metal, and in cases of heavy tarnish, you may even detect a faint sulfuric scent—a clear indication that the dark oxidation is being pulled off the jewelry and converted into a gas. For lightly dulled items, the transformation can be nearly instantaneous, often requiring less than sixty seconds. For pieces that have been neglected for years and have developed a thick, black layer of oxidation, a soak of five to ten minutes will allow the reaction to reach the deepest layers of the metal.
While this method is a miracle for gold, silver, and brass, it is important to exercise a degree of discernment regarding what you submerge. This hot, electrolytic bath is ideal for solid metals, but extra caution should be taken with pieces that feature delicate or porous gemstones. Materials such as pearls, opals, turquoise, and emeralds are sensitive to heat and chemical changes and should never be subjected to boiling water or strong cleaning solutions. Similarly, if your jewelry features stones that are held in place by glue rather than traditional metal prongs, the hot water could potentially soften the adhesive and cause the stones to fall out. For these more fragile items, a gentler approach involving lukewarm water and a very soft cloth is always the safer path.
Once the soaking period is complete and the metal looks bright once more, use a pair of plastic tongs or a spoon to carefully remove the jewelry from the hot bath. Rinse each piece thoroughly under cool, running water to ensure that every trace of the salt and soda solution is washed away. Leaving residue behind can actually encourage new tarnish to form more quickly. After rinsing, pat the jewelry dry with a clean, lint-free microfiber cloth. For the final touch, give the metal a gentle buffing with a dry section of the cloth. This final step polishes the surface and restores that mirror-like finish that makes high-quality jewelry so captivating.
The results of this DIY method are often indistinguishable from professional services. By taking ten minutes out of your afternoon to use these household staples, you are doing more than just cleaning an accessory; you are preserving a memory and protecting an investment. There is a profound sense of satisfaction in watching a blackened, forgotten ring transform back into a brilliant piece of art right before your eyes. In a world where we are often told that “new” is the only way to get “bright,” this kitchen-counter hack serves as a reminder that with a little bit of science and a few pantry basics, what was once old can be made breathtakingly new again. Your jewelry was meant to be seen and admired—now, there is no reason for it to ever stay hidden in the shadows of tarnish again.